Interactive Analysis & Workflows#
06/16/2025
SeqsLab supports diverse analysis styles, from exploratory data science using interactive notebooks to production-grade automated pipelines. All analysis tasks are managed through the Jobs module.
Creating a New Job#
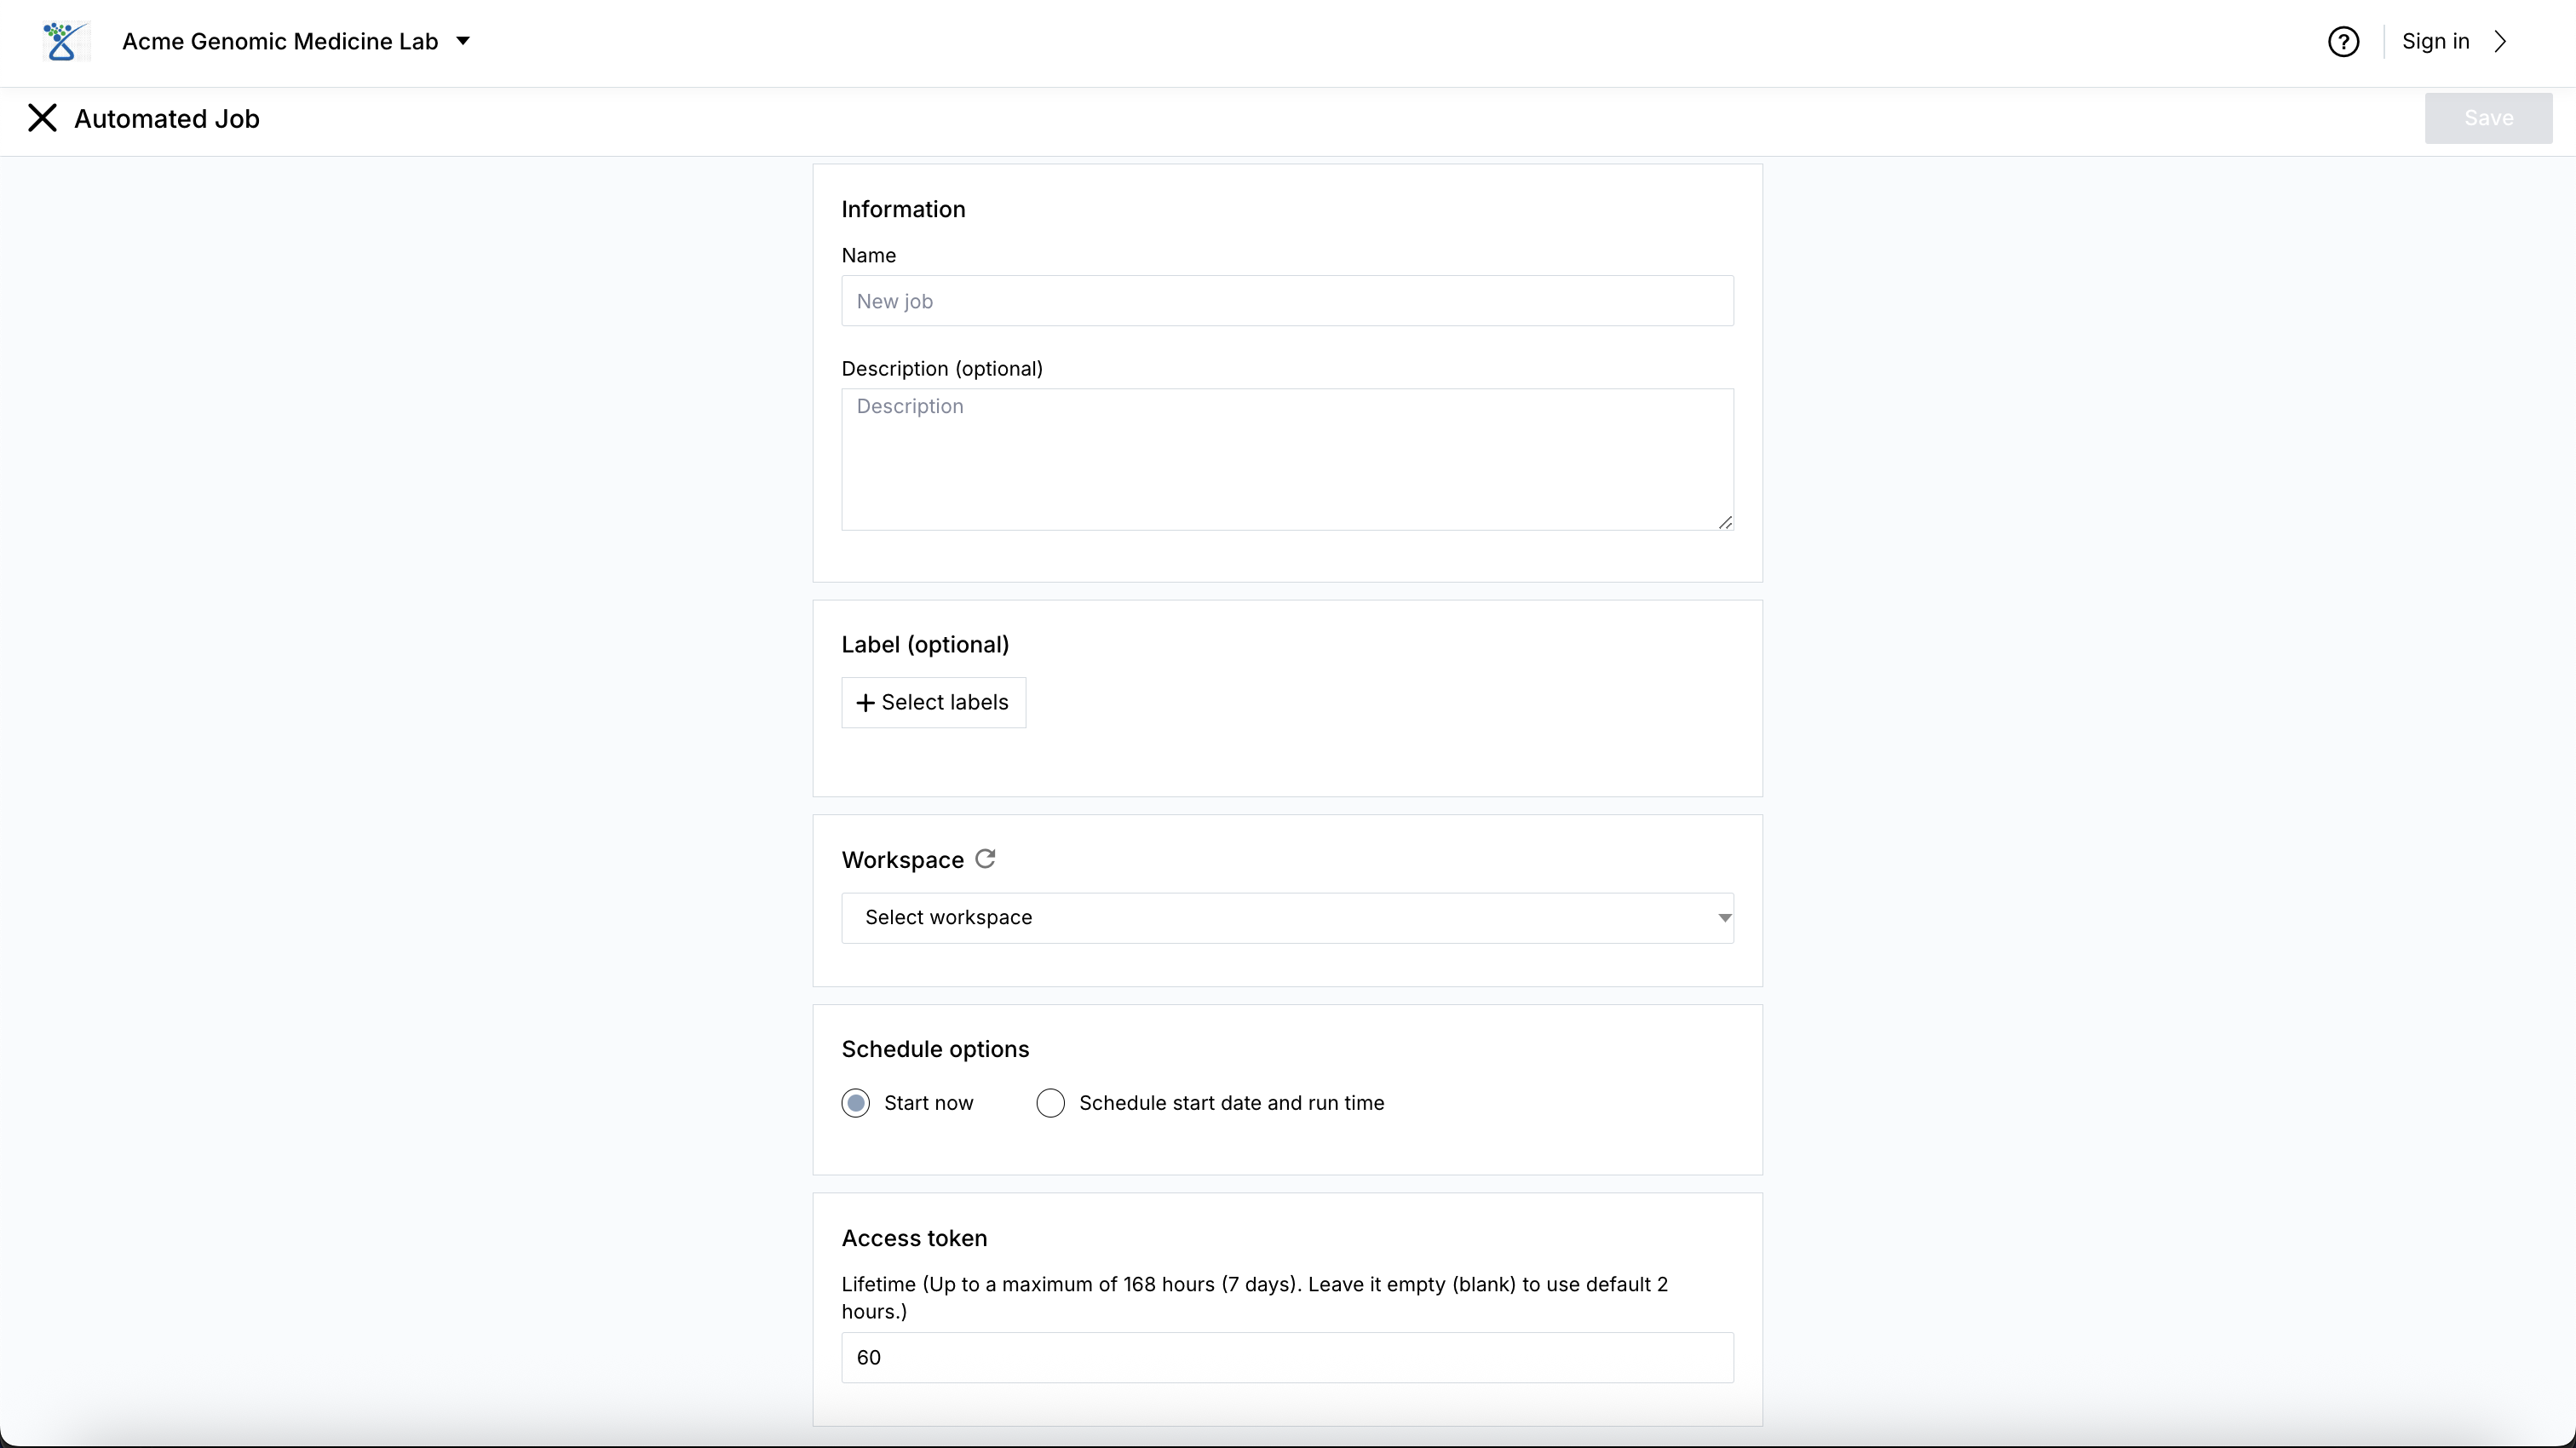
To start an analysis, click the + New Job button. You will be prompted to choose between two primary job types:
Automated: For running standardized pipelines (e.g., WDL workflows) that execute from start to finish without manual intervention.
Interactive: For launching exploratory environments like JupyterLab or SQL Lab where you can run code in real-time.
Automated Workflows (WDL)#
Automated jobs are used for high-throughput processing. SeqsLab orchestrates the execution of Workflow Description Language (WDL) scripts across high-performance cluster computing resources. For a detail about high-performance cluster computing in SeqsLab, see SeqsLab workflow engine.
Data Lakehouse Integration
For every automated job, the Job Name is used to automatically create a dedicated database (schema) within the SeqsLab Data Lakehouse. All tasks within that workflow that generate Delta tables will store their output directly in this database.
Workflow Configuration Steps:
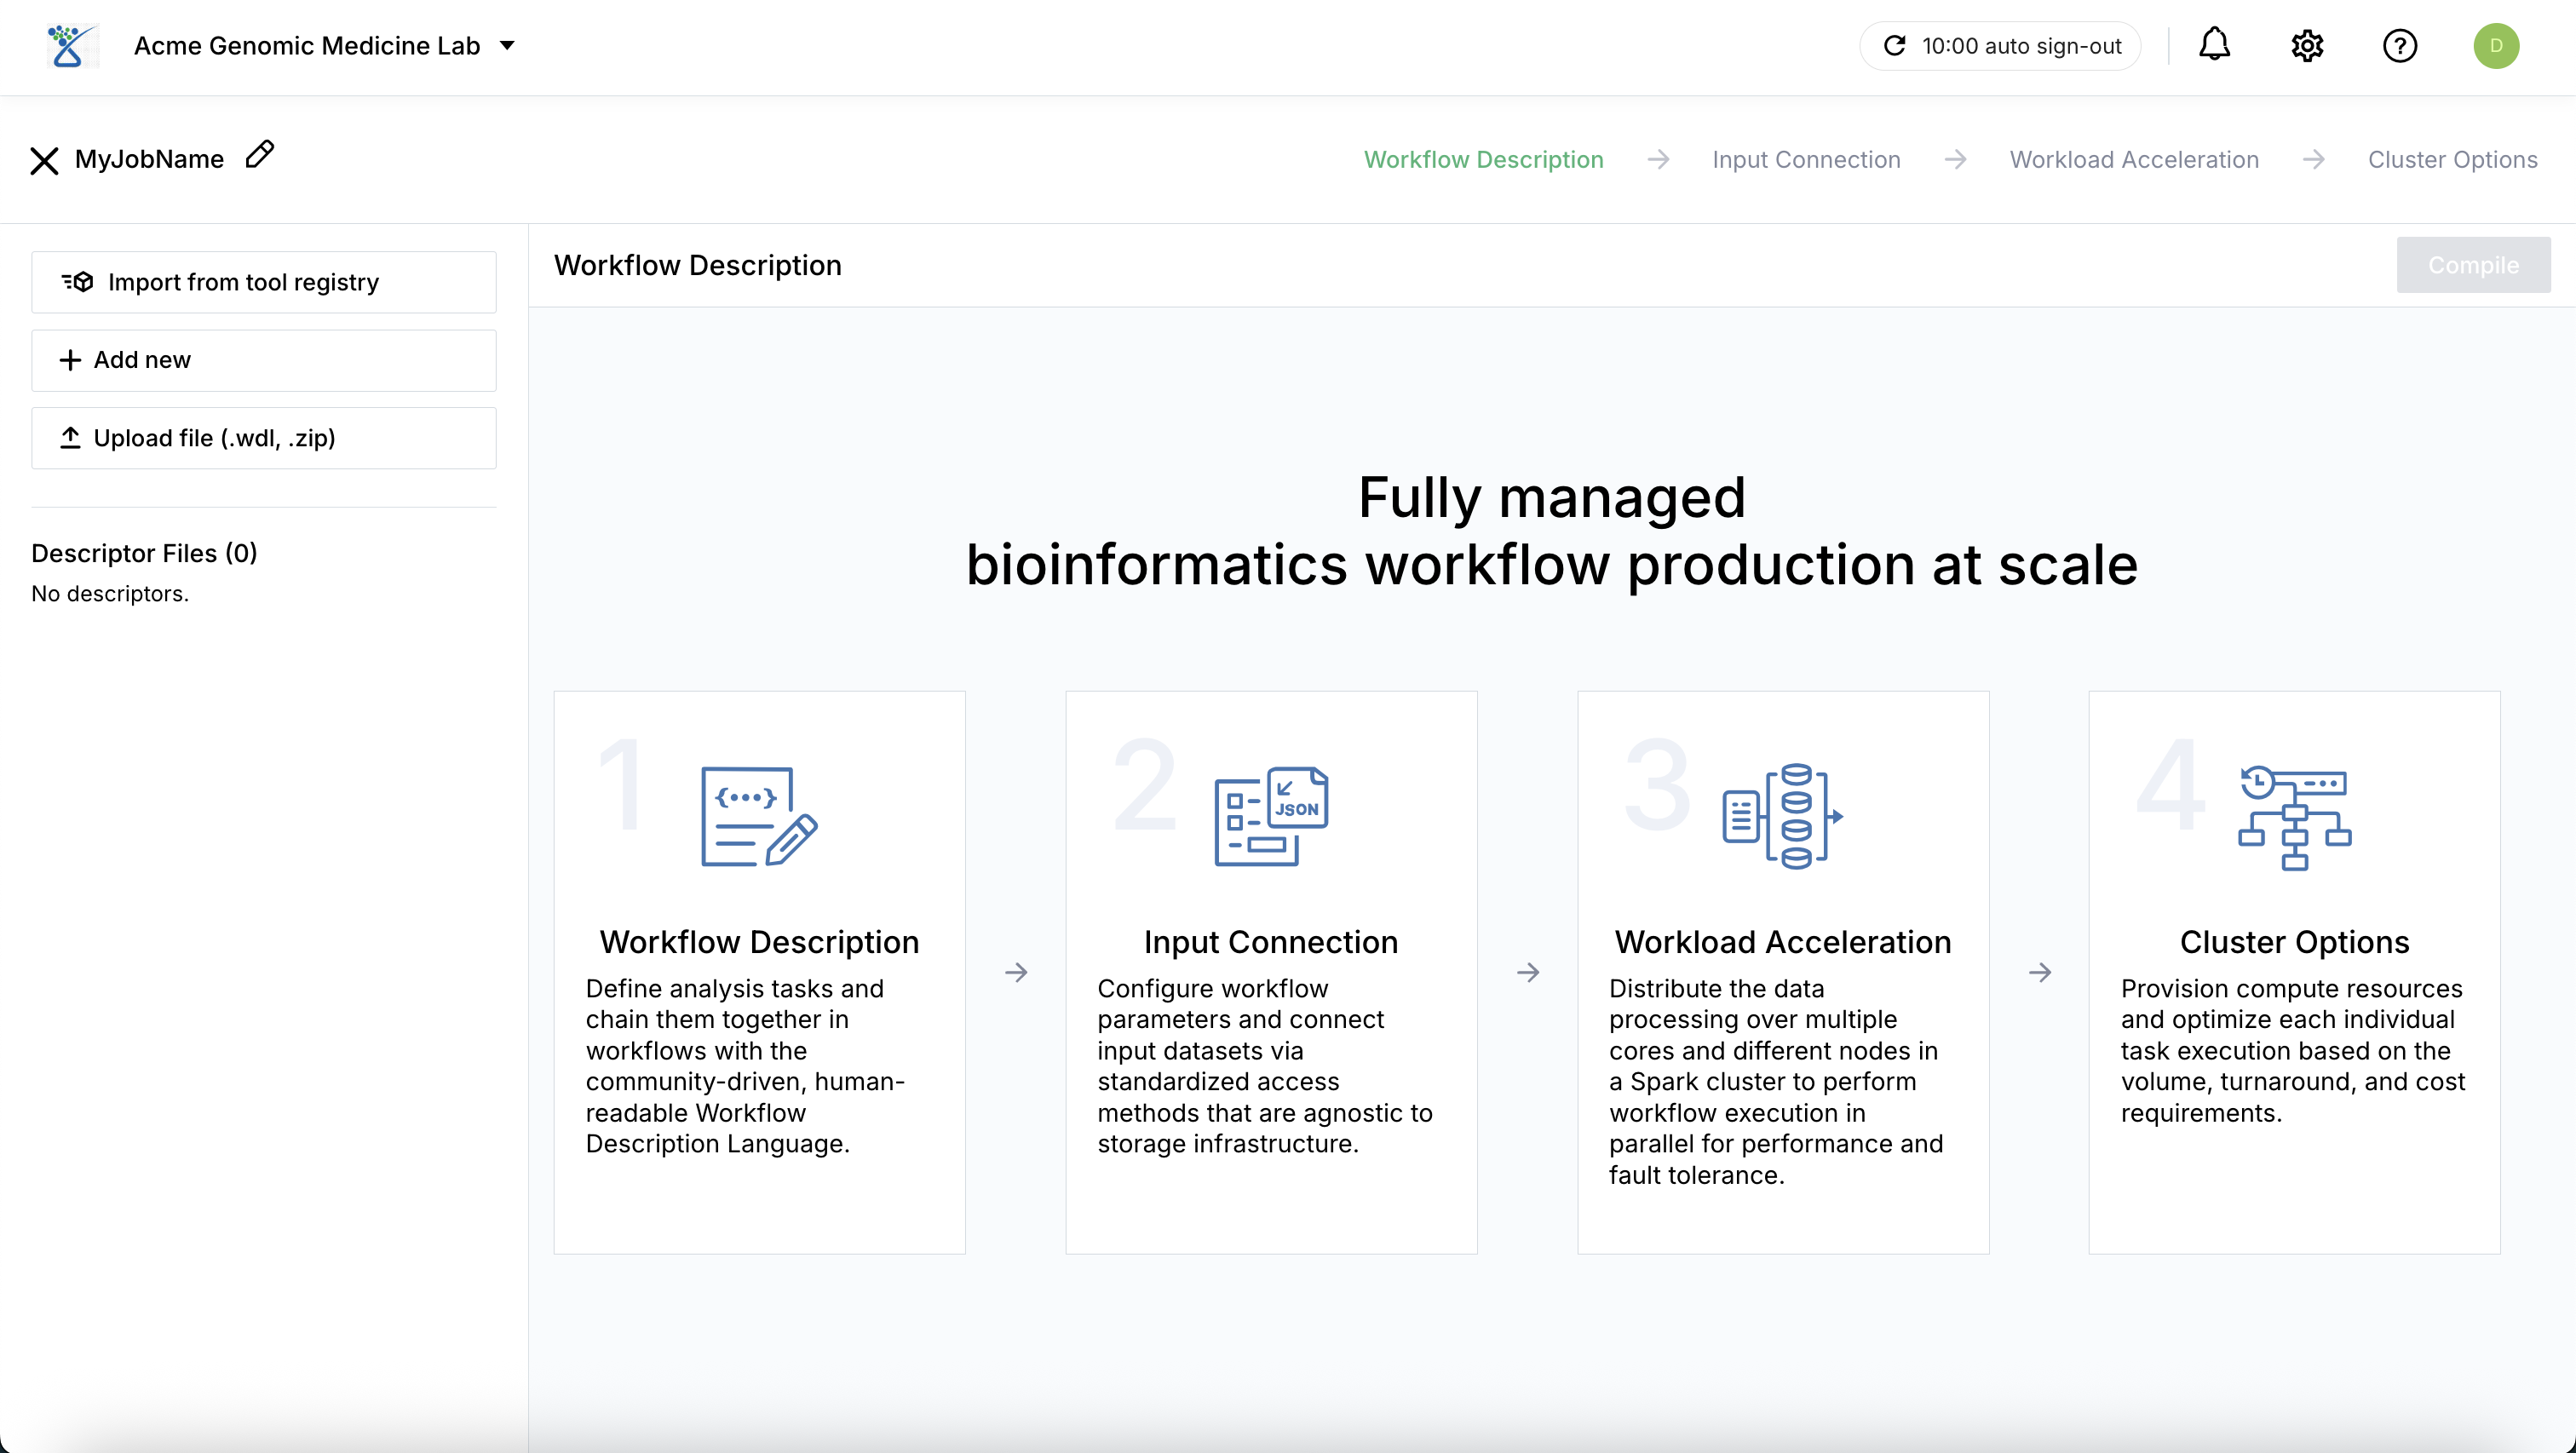
Workflow Description: You can select a pre-registered workflow or provide your own:
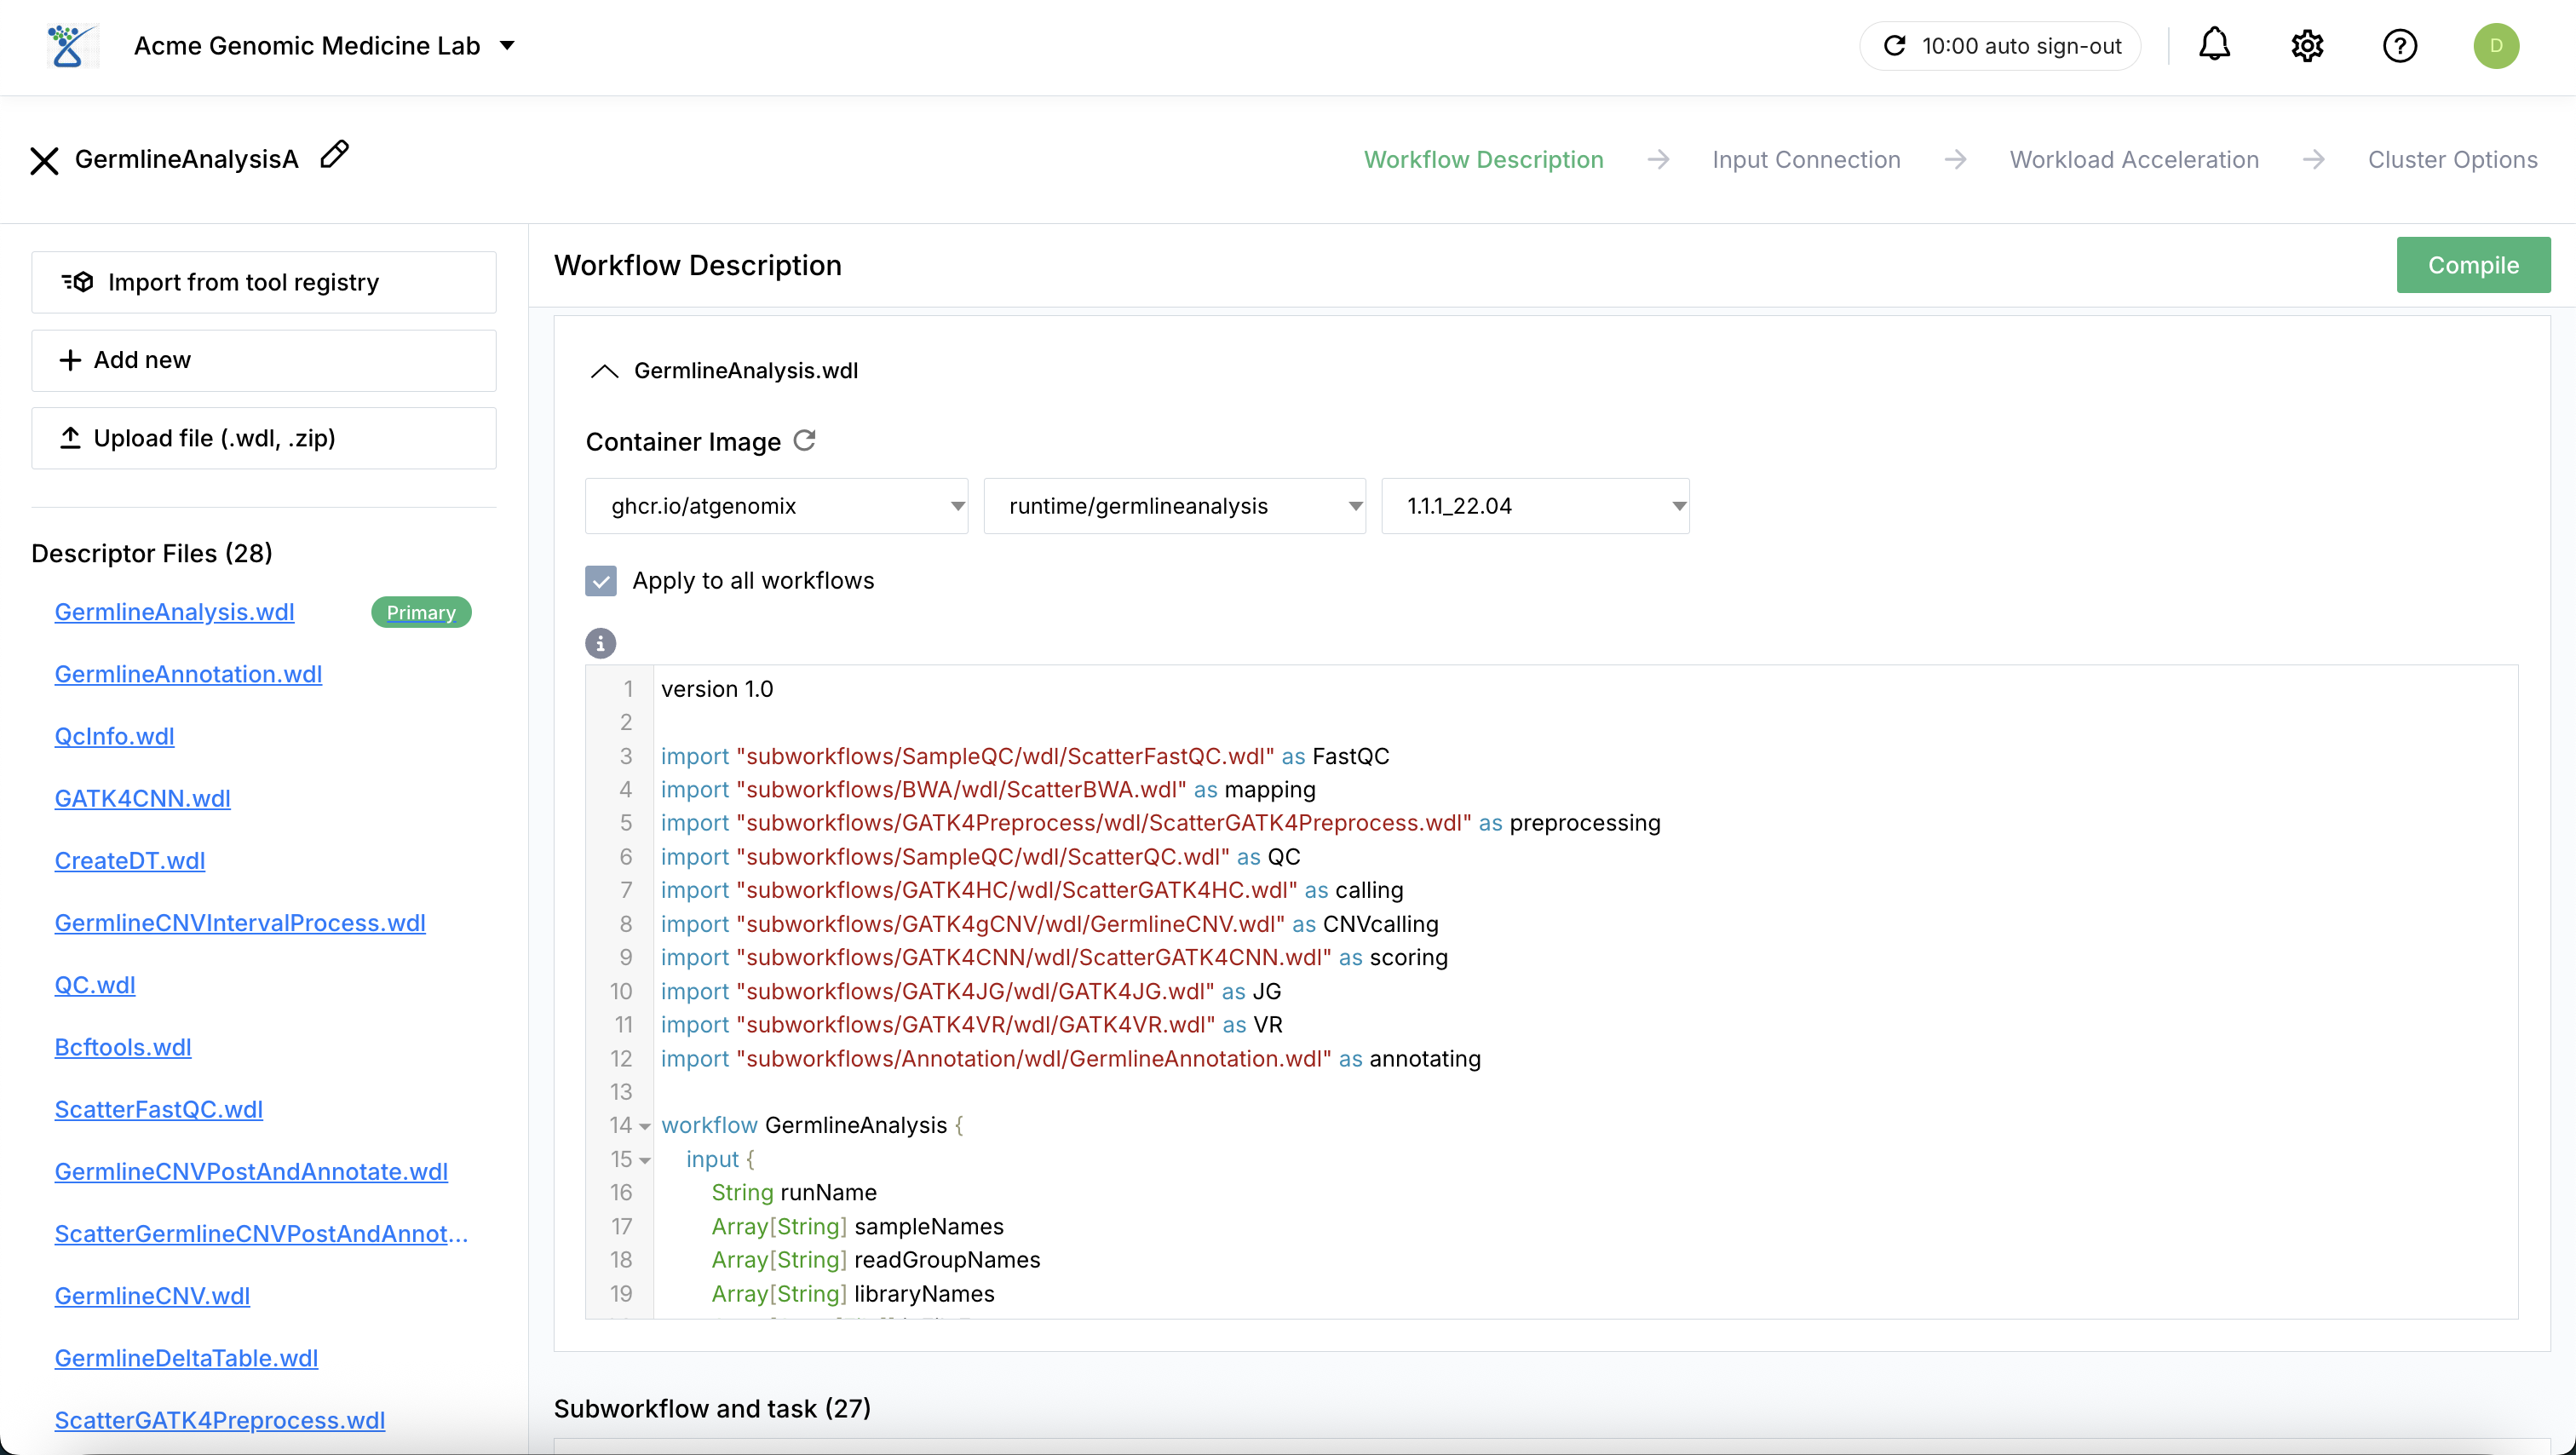
Tool Registry: Select from pre-registered WDL workflows within your organization.
Custom Upload: Upload your own workflow description files (e.g., .wdl or .zip). When uploading a ZIP archive, SeqsLab automatically loads all files while preserving the original directory structure and relative paths.
Modification: Upon selection or upload, the workflow’s source code and associated containers are displayed and can be modified for the current execution.
Compilation & Validation: Click Compile to compile the workflow files. This process validates the WDL logic and automatically identifies the required input parameters to ensure the workflow can be executed correctly in a high-performance cluster computing environment.
Input Connection: Map your input parameters. For input files you can select datasets directly from the Data Hub. Alternatively, importing an existing JSON file of workflow inputs can automatically satisfy the workload requirements.
Workload Acceleration: Choose specific acceleration profiles (e.g., parallel compute for read mapping) to optimize execution efficiency. By default (i.e., when no operator pipelines are applied), the workflow is executed in a single-node mode.
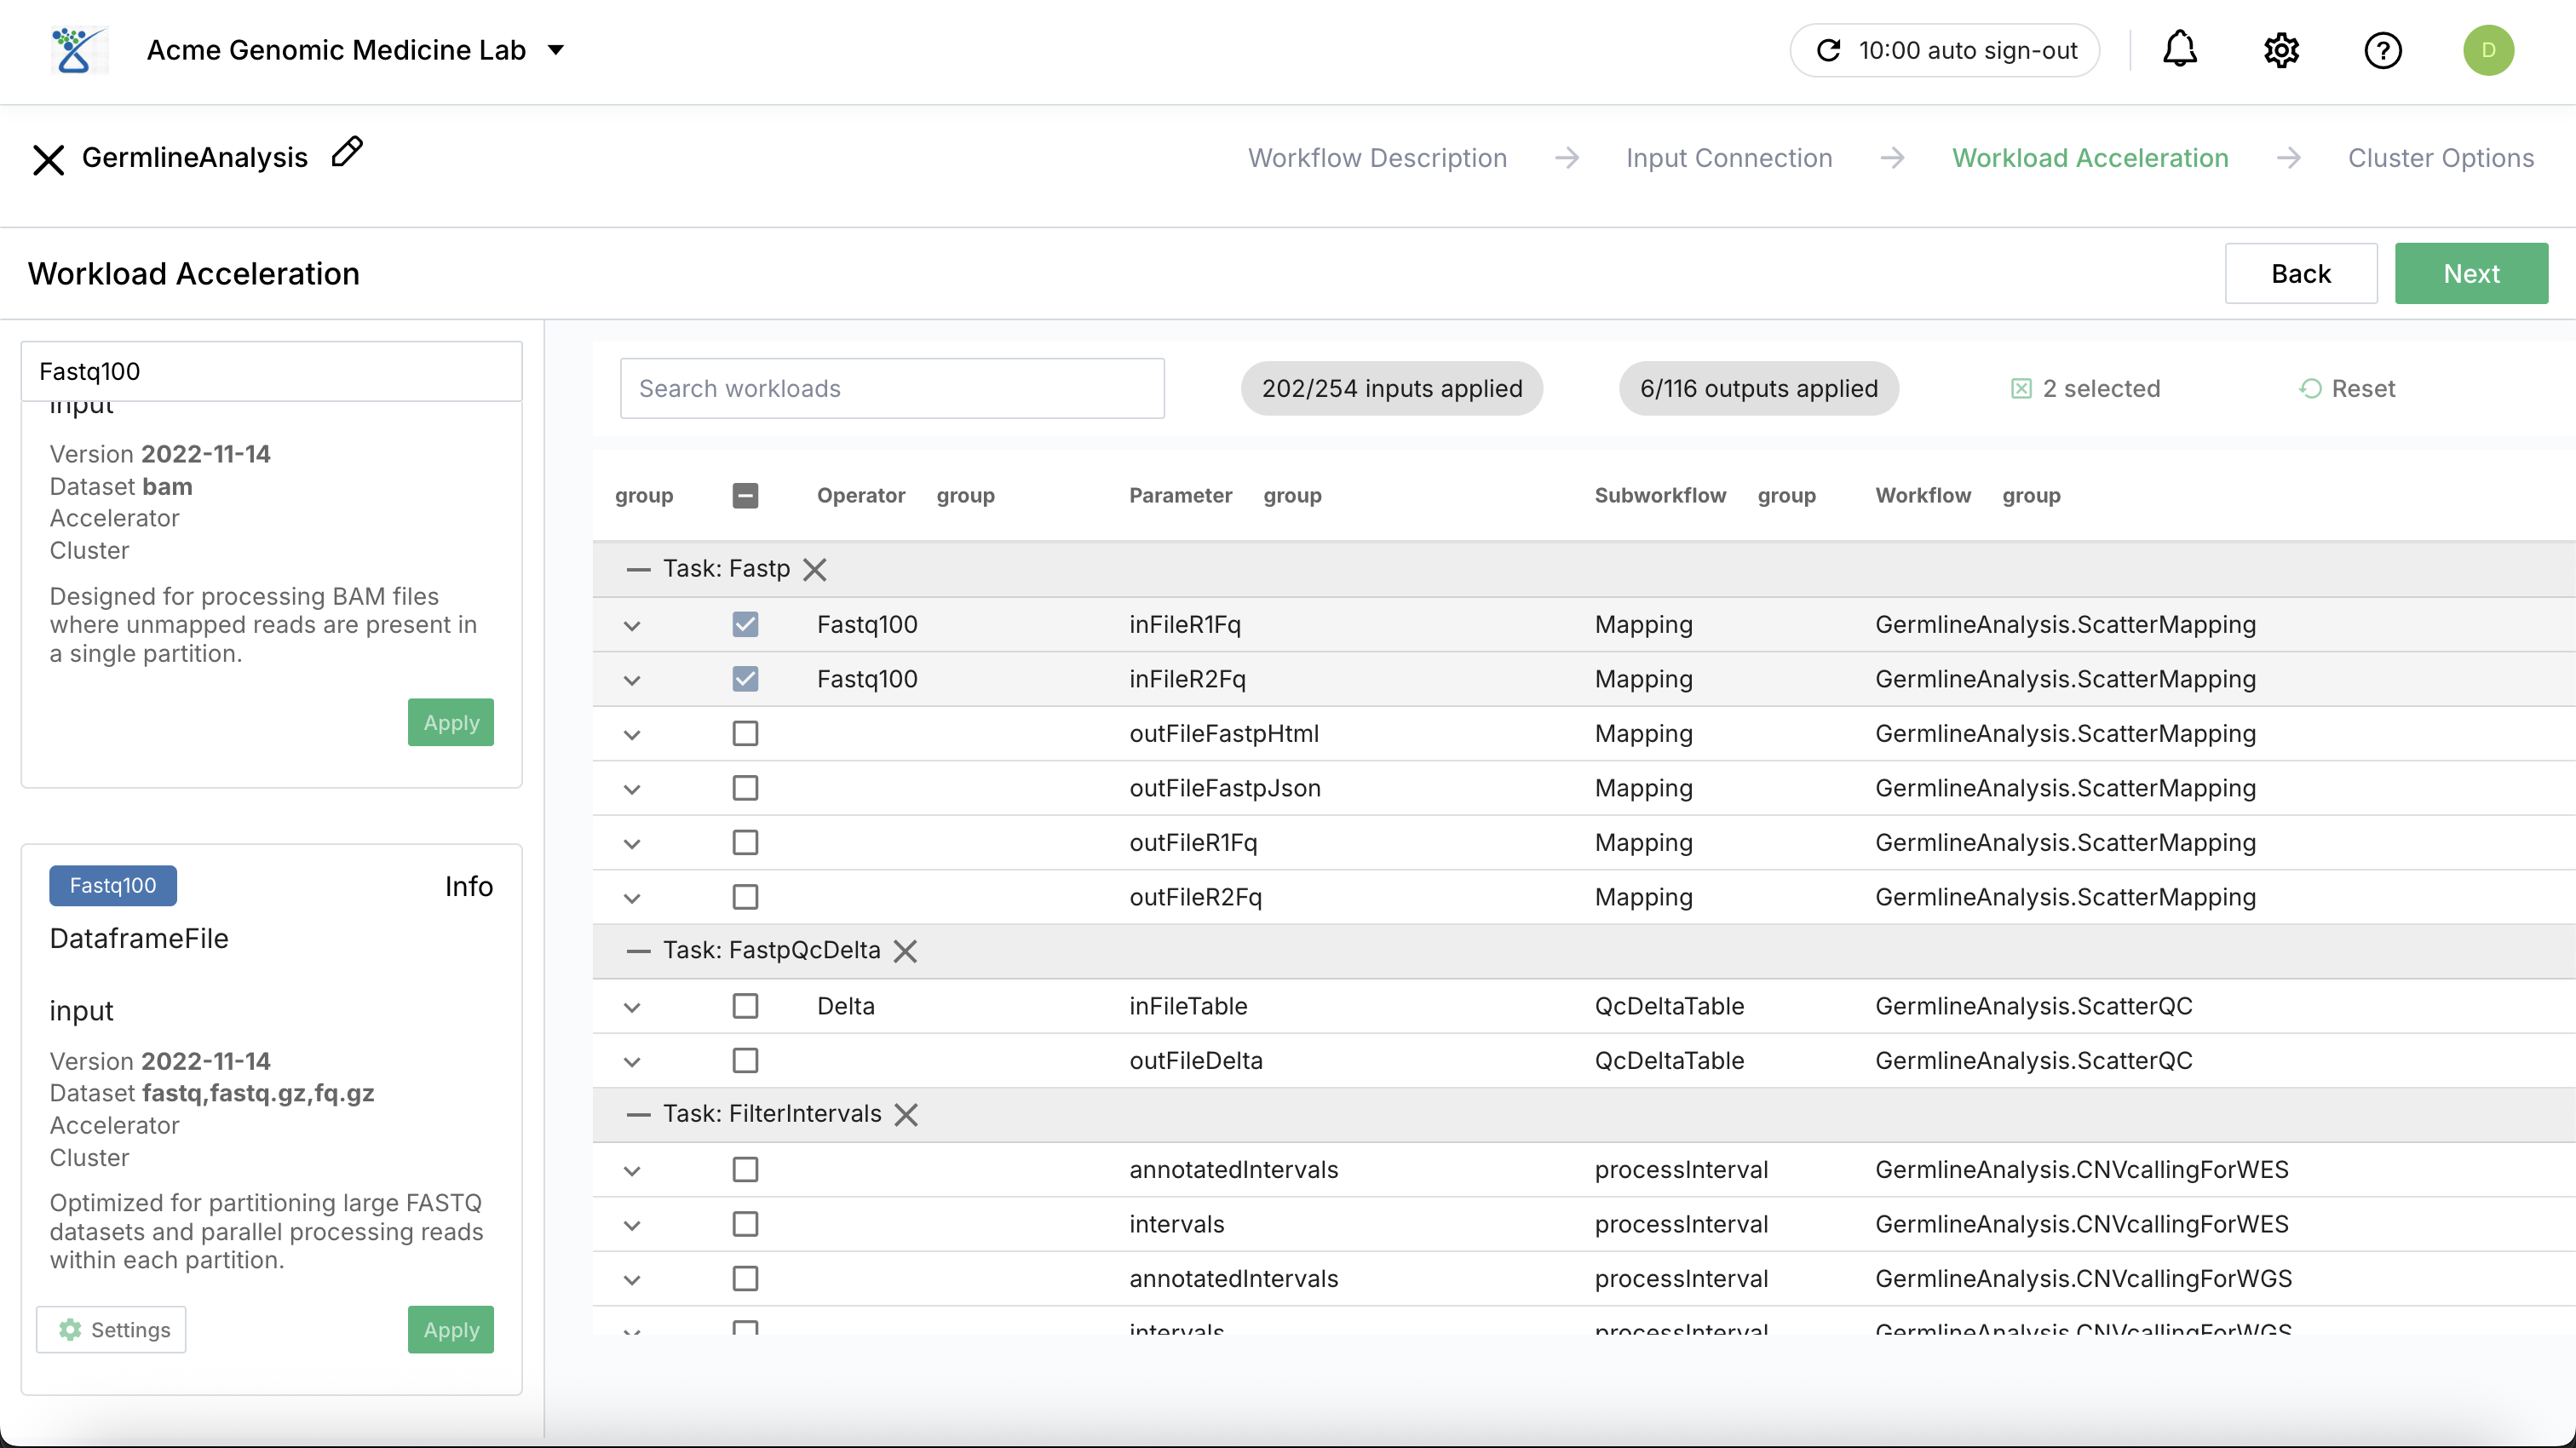
Parallel Execution: Distribute the data processing over multiple cores and different nodes in a cluster computing to perform workflow execution in parallel for enhanced performance and fault tolerance.
Delta Operator: For Delta type input, you can use the Delta operator pipeline designed for DataFrame workloads associated with tasks utilizing SQL commands.
Operator Pipelines: For the list of available operator pipelines, see operator pipelines.
Cluster Options: Provision compute resources and optimize each individual task execution based on the volume, turnaround, and cost requirements.
Task-Specific Tailoring: You can assign a managed cluster (e.g., m4-40xcluster, 320 vCPUs and 2560 GiB of memory featuring distributed spot instances) to a specific call within the workflow.
Workflow-wide Configuration: A default configuration is used for any calls where a specific managed cluster is not assigned. This flexibility ensures compute resources are tailored for certain calls to maximize cost-efficiency and execution performance.
Spot Instance Strategies: Users can leverage a mix of spot and dedicated instances for further cost savings based on the acceptable impact on turnaround due to potential instance interruption:
High-impact (None): 100% dedicated instances for guaranteed turnaround.
Medium impact: 50% spot instances.
Low impact: 80% spot instances.
No impact (Cost Optimized): 100% spot instances for maximum savings.
Job Submission: Click Create to submit a job for the workflow. When the workflow is newly configured or is modified from a pre-registered workflow, the system will ask you to create a new workflow version in the tool registry within the organization.
From Pipeline to Notebook
Because automated jobs create a schema based on the job name, you can easily access and query the resulting tabular data using an Interactive Job (SQL Lab or JupyterLab) once the pipeline completes.
Managing Long-Running Jobs
For automated workflows that are expected to run for more than 24 hours, ensure you set the Access token Lifetime. By default, tokens are valid for 2 hours and are refreshed up to 24 hours, but they can be extended up to a maximum of 168 hours (7 days) to ensure continuous access to controlled resources.
Smart Reuse & Job Resumption#
SeqsLab includes Smart Reuse capabilities to streamline the setup of new analyses and optimize recovery from failed executions. Failed jobs can be resumed using these methods within a 2-week retention window.
Reuse Strategies#
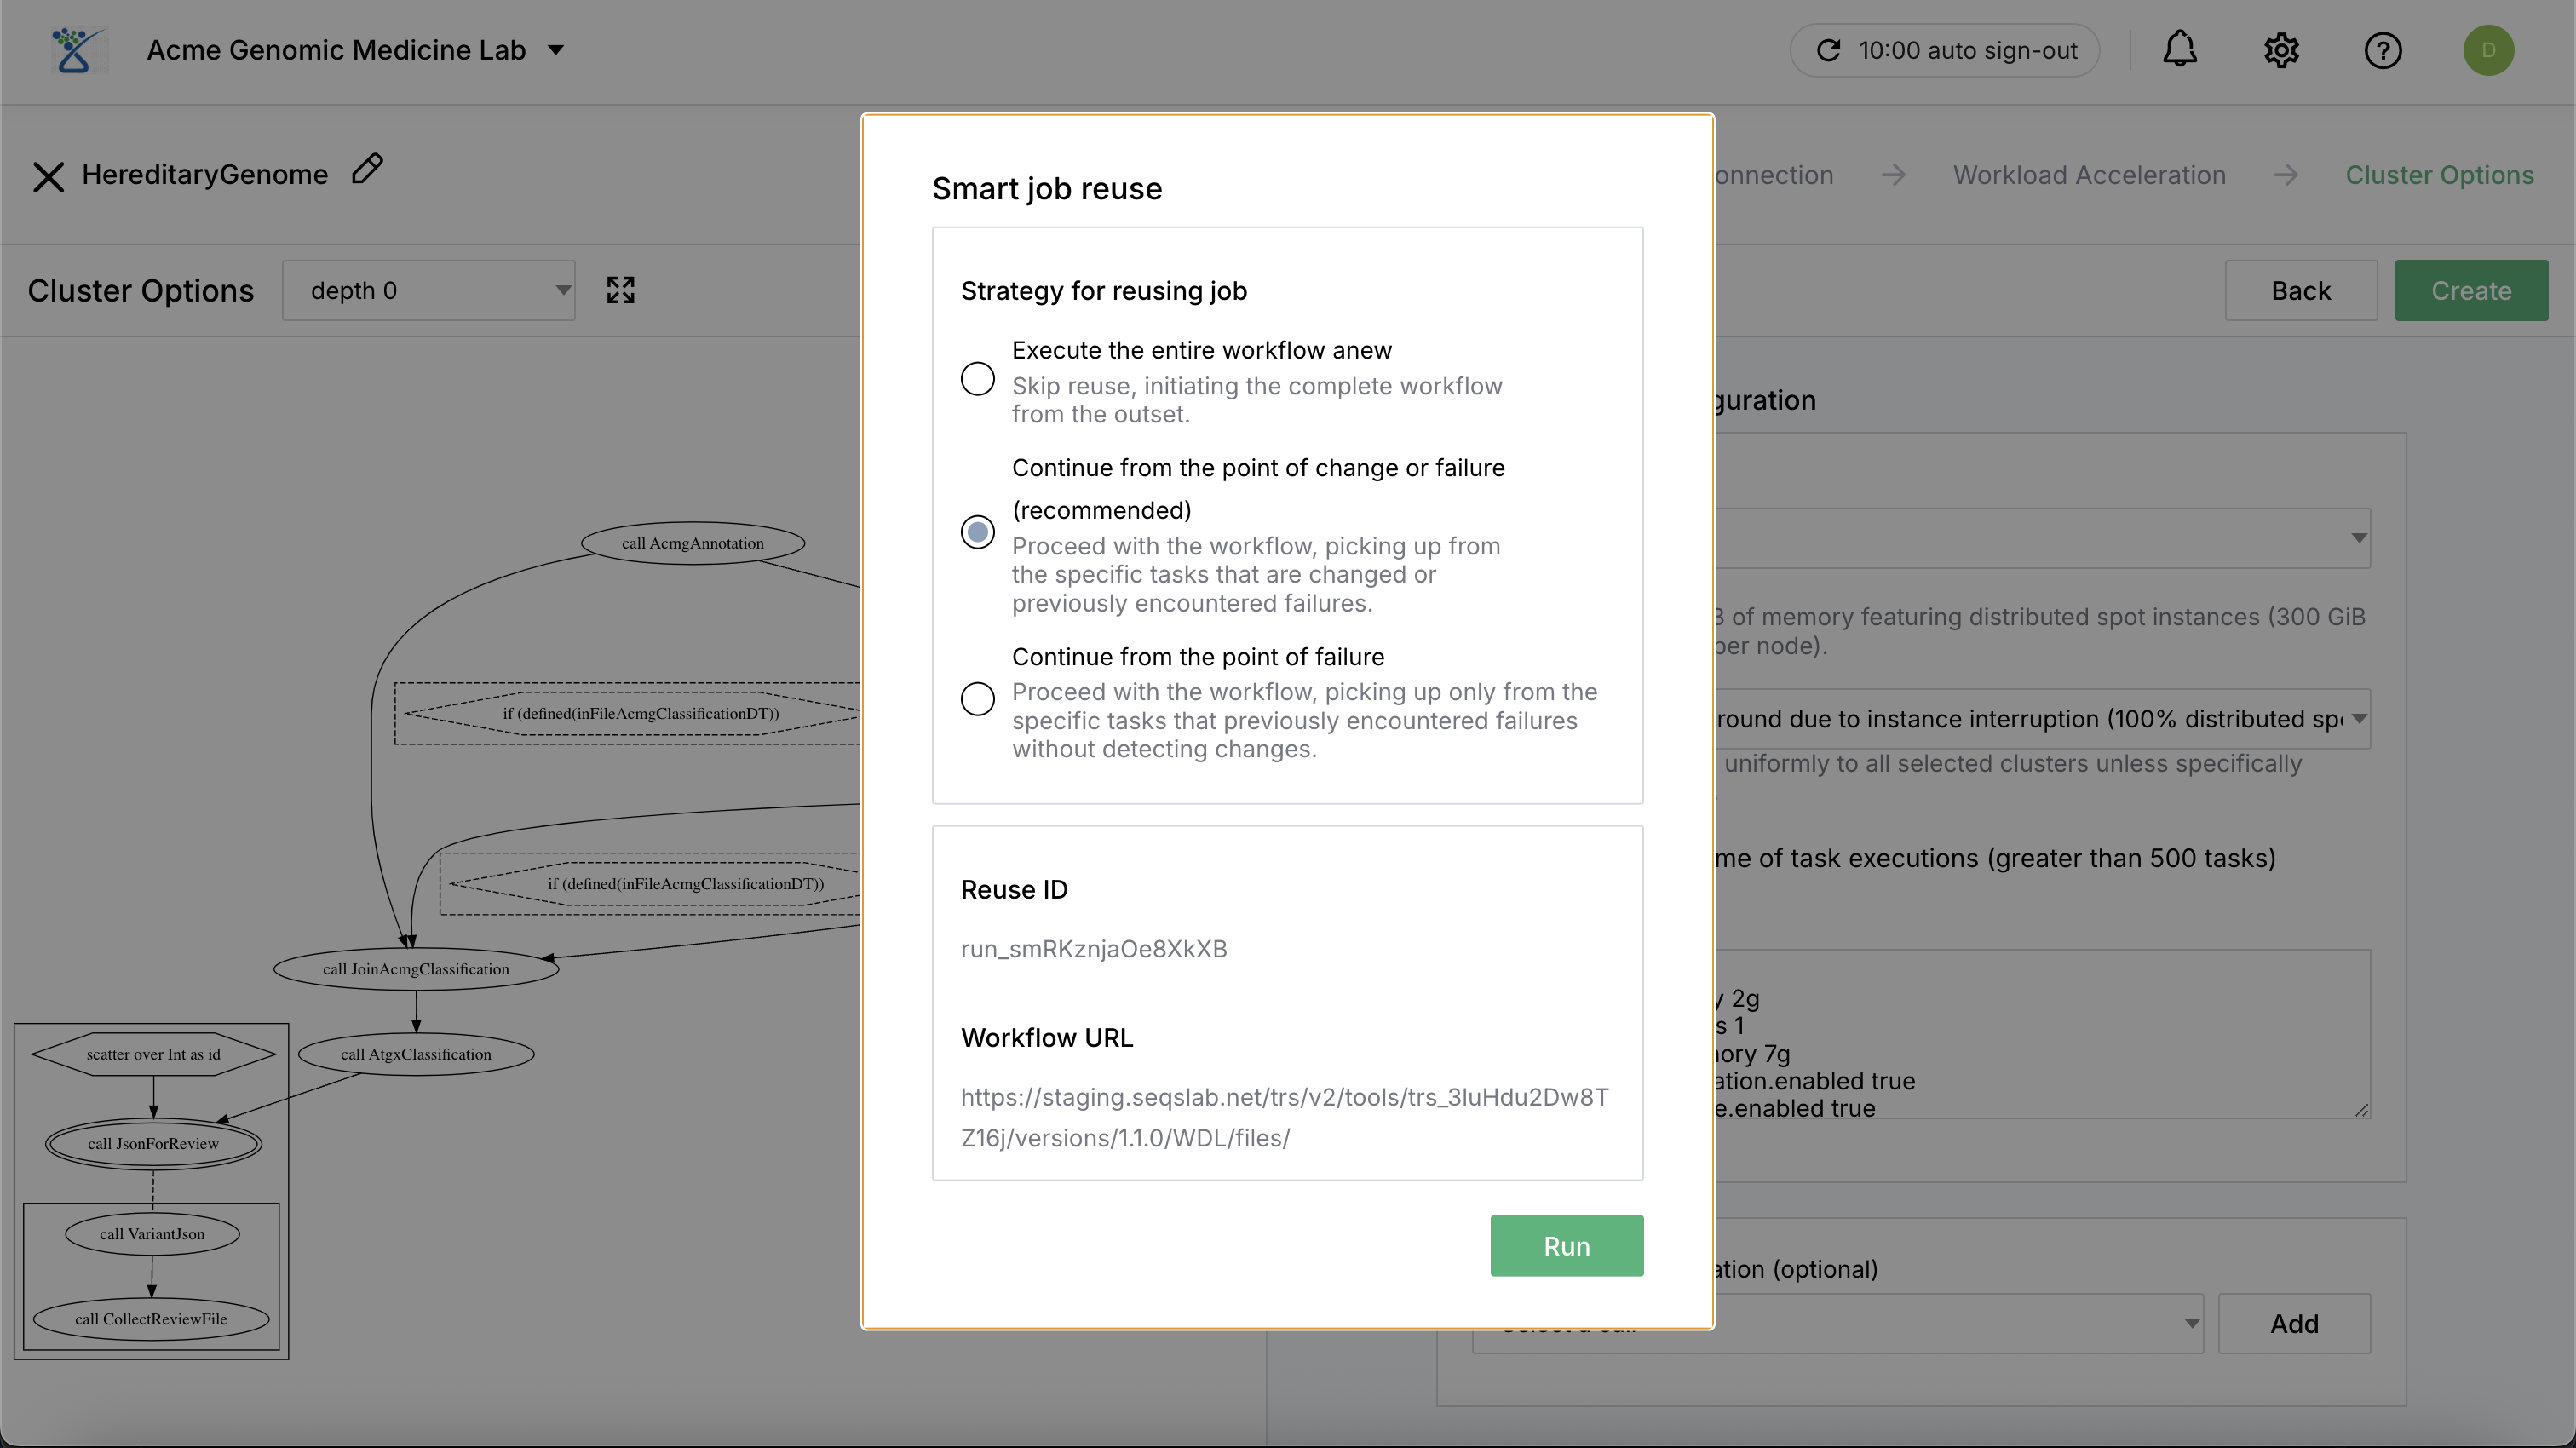
When cloning a previously run job or rerunning a failed one, you can choose from three primary reuse strategies to balance thoroughness and efficiency. For strategies 2 and 3, the system will only reuse and skip a task if the task outputs still exist and are valid in the storage layer.
Execute the entire workflow anew: This strategy skips all reuse logic and initiates the complete workflow from the outset. Use this if you want to ensure a completely fresh execution regardless of previous successes.
Continue from the point of change or failure: The system proceeds with the workflow by picking up from specific tasks that have changed (in code or configuration) or previously encountered failures. Successful, unchanged tasks are skipped to save time and cost. For continuing from the point of change or failure, the system will only reuse and skip a task if the task outputs still exist and are valid in the storage layer.
Continue from the point of failure: The system proceeds with the workflow by picking up only from specific tasks that previously encountered failures. It does not detect changes in the workflow logic or parameters, making it the fastest way to resume a purely technical failure. As with strategy 2, the system will only reuse and skip a task if the task outputs still exist and are valid in the storage layer.
Interactive Analysis#
Interactive jobs provide a persistent and secure environment for data exploration and visualization.
Setting Up an Interactive Job:
Run Datasets: This is the default database used in SQL-based analysis. Users can select specific databases created by previous automated jobs to query their output tables directly.
Resource Allocation: Specify the workspace, select the appropriate container image (e.g., specialized Python/R environments), and assign the managed CPU/GPU cluster that will back the session.
Schedule Options: Flexible scheduling allows you to manage compute costs and availability of the resource accesses effectively:
Start now: Launch immediately and optionally schedule stop with a pre-defined termination time.
One-time schedule: Schedule both a specific start and stop time in the future.
Recurring weekday schedule: Automate the availability of the environment by scheduling start and stop times for specific weekdays.
App Access: Once the job state changes to RUNNING, the system provides secure connection links. Click the job and visit its Activity in the right panel to access those links.
Connecting to Hosted Applications
When your job is active, the system utilizes one-time tokens to grant you secure access to the hosted application. The tokens are automatically invalidated once the job is stopped.
The Activity panel provides several types of connection strings:
Connect to SQL: This connection string allows you to create a Python DB API connection to SeqsLab interactive clusters. It is a Hive-Thrift-based client connection with no dependencies on ODBC or JDBC, making it ideal for developing Python-based workflow applications. It can also be used to integrate Apache Superset for executing DQL via external BI and data tools.
Connect to JupyterLab: Direct URL access to the IDE.
Connect to Spark Context: Beyond providing a hosted Spark cluster, SeqsLab allows developers and researchers to access controlled datasets and resources in a fully managed Spark cluster. This connection string leverages the Spark Connect protocol to provide a remote interface for high-performance distributed data processing and complex transformations using the Spark DataFrame API. It enables interaction with the cluster from remote environments or local development tools without requiring a full Spark installation.
Access to Shiny App: Secure web access to Python- or R-based visualizations.
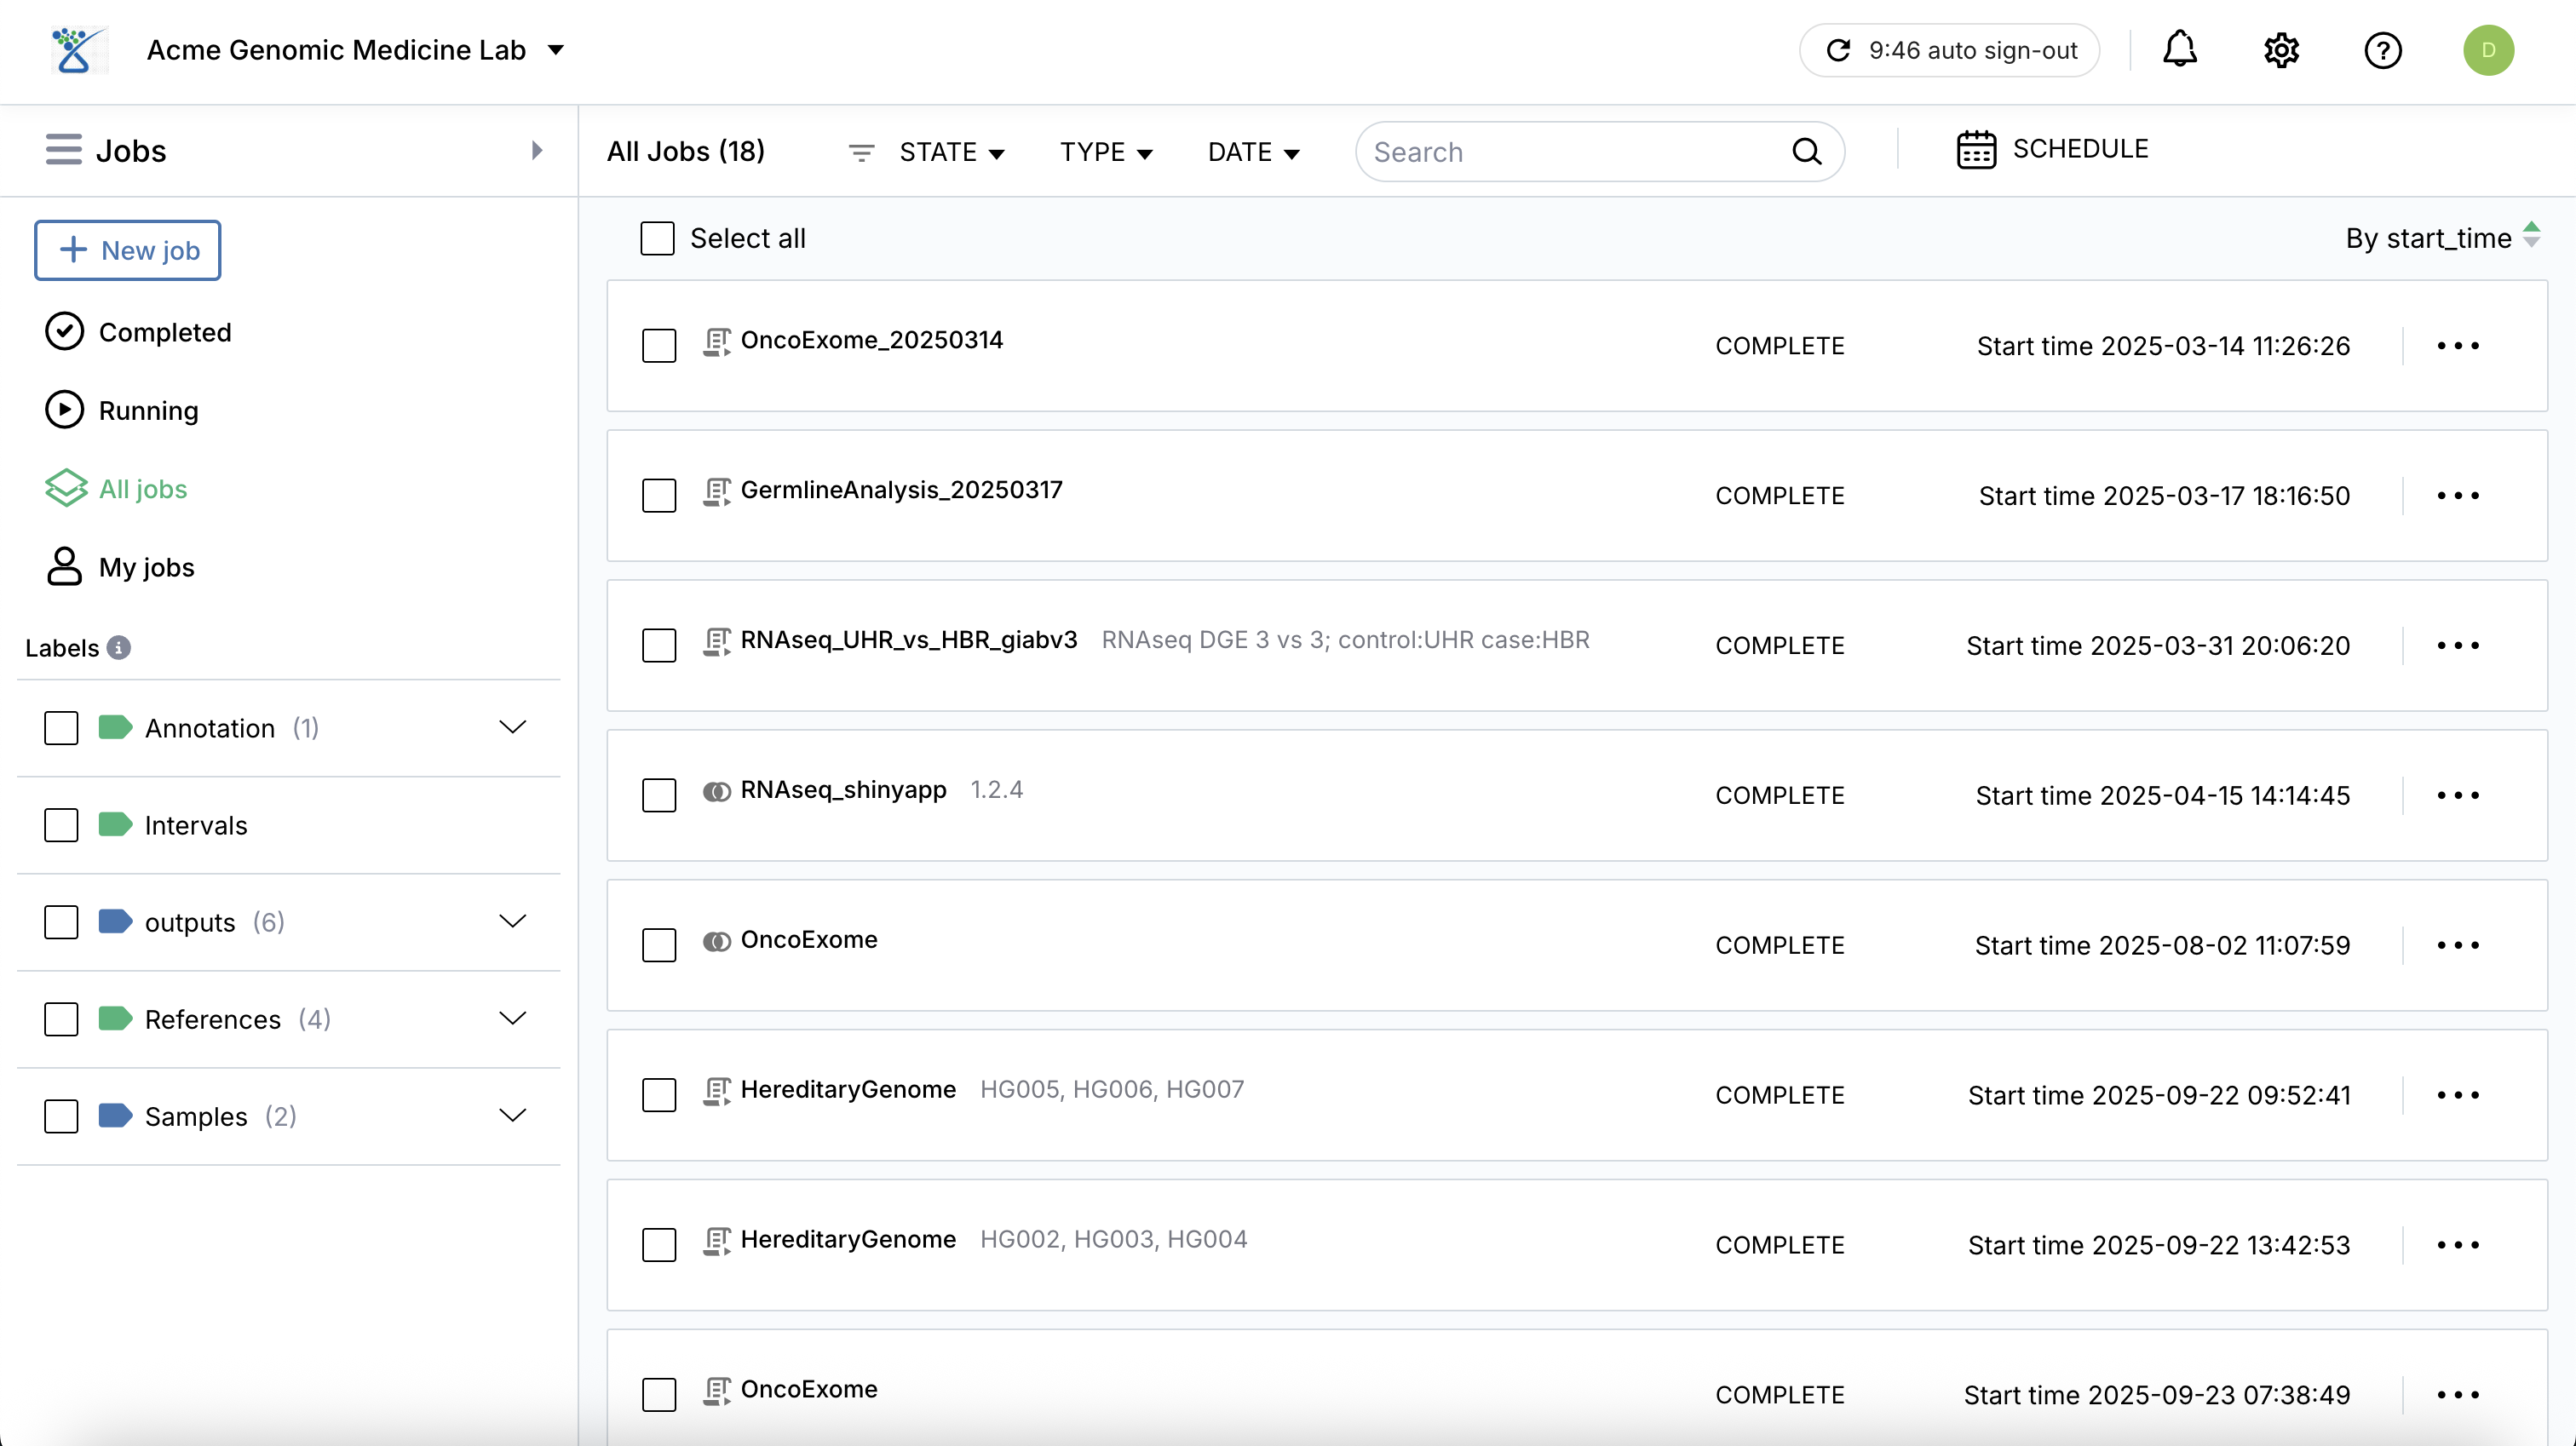
Monitoring and Management#
The Jobs dashboard provides real-time visibility into your analysis:
Status Tracking: Monitor states such as QUEUED, RUNNING, COMPLETE, or EXECUTOR_ERROR.
Logs & Activity: Click on any job to view detailed activity and execution logs, resource usage, and the specific version of the workflow used.
Batch Actions: Stop or restart jobs directly from the main table view.
Tip
For complex WDL pipelines, use the Workload Acceleration settings to significantly reduce turnaround time for cohort variant calling.
Additional Resources#
Documentation
SeqsLab Run Sheet for sequencing experiments
Learn how to provide a streamlined path for automating the high-throughput analysis of Illumina sequencing experiments,
moving from raw data ingestion to structured genomic results.